Operation of the Paraconical Pendulums
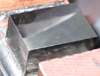
There are many facets to the operation of a paraconical pendulum, and we hope to touch upon them all here. To consider what happens at the top: first, it is necessary to make proper parking arrangements for the pendulum, and to fix an accurate (metrologically planar) flat on top of the rough base flat that has already been fixed upon the support bar with epoxy. A couple of photos showing these matters can be seen here. Next, we must level the flat accurately. Click here for a sequence showing this. After leveling, the pendulum should be placed upon the ball which is resting upon the flat. This must be done very delicately, and it cannot reliably be done by hand. Click here to see how we did this. That completes the details at the top of the pendulum. By the way, at the end of each experimental run, it is essential to protect the ball and the flat by covering them with a layer of light oil or grease. Superficial rusting can easily spoil these very accurate surfaces overnight. There are two items of equipment required at the bottom end of the pendulum: a scale to read off the movement of the bob, and a launch mechanism. The scale is very straightforward to implement, and some photos can be seen here. The implementation of a satisfactory launch mechanism is not easy. The words of G. B. Airy the Astronomer Royal, a hundred and fifty years ago, are still to the point: "The difficulty of starting a free pendulum, so as to make it vibrate at first in a plane, is extremely great; and every experimenter ought to be prepared to judge how much of the apparent torsion of its plane of vibration is really a progression of apses due to its oval motion." One must make a basic decision - whether to use the traditional burnt-thread method, or whether to attempt to build a mechanical release. I actually think that the way forward to the future will be to develop a mechanical system, a sort of "snap-out-of-the-way" release analogous to the type that was used by Saxl and Allen for their torsion pendulum. (Although Latham seems to have managed with a simple Teflon ring slipping off a metal pin...) However building a fiddly mechanical system was not a practical option for our Sarawak experiments, so we worked on implementing the burnt-thread system. We tried many different setups with varying success; it was very laborious. The criterion for a launching system to be satisfactory is simply that, reliably upon every release, the pendulum should initially swing to and fro in a straight line, not in a narrow ellipse; in other words, immediately after the release, there should be no substantial minor axis visible. Of course, from the ideal point of view, "visible" is not good enough; if we had a good laser rangefinder setup, we could know, to the micron, the real value of the initial minor axis of the inevitable narrow ellipse; and we could even allow for the resulting "Airy precession" or "area precession" in processing the experimental results. Perfecting such electronic instrumentation is another task for the future. We figured out that, for a very sensitive short pendulum like a paraconical pendulum, it is no good to use a multifil thread for the release, because sometimes such a thread does not burn through all at once, but rather fil by fil in a jerky manner, and this imparts a sideways impulse to the bob. Therefore we settled upon the use of nylon monofil - ordinary fishing line. Now, when the line is holding the bob sideways ready for release and is under tension, some energy will be stored up in it - and this is particularly true for nylon fishing line which is very elastic. When the line is burnt, this energy has to go somewhere; and we don't want it to go into the bob and cause sidewise motion. So this means minimizing the length of line which is stretched, or at least minimizing the length of stretched line whose energy is released towards the bob. We designed a sort of 'fusible link' made from common components: photos can be seen here. We mass-produced these for each experimental run. We also realized that it would be best for as much of the handling of the pendulum as possible to be done mechanically rather than manually, in order to avoid skidding of the ball on the flat due to rough handling of the bob. So (having by now gotten fishing on the brain) we decided to modify a fishing reel into a hauling-in mechanism for the pendulum. It worked very well. Click here for a sequence of photos showing how our launch mechanism worked. A picture is worth a thousand words... and a movie is sometimes worth a thousand pictures. These movies are rather large, but if your internet connection can manage it, they are highly recommended, because they show the entire catch, pull-out and tie-up, and launch procedure very clearly. Click here to play (or right-click to download) a 33MB .avi movie showing the procedure for stopping the pendulum and securing it from the launch system, ready to be launched again. And here for a 9MB .avi movie showing the pendulum being released, after we waited for a couple of minutes to allow any vibration to die out. And here for a 3MB .avi movie just showing the pendulum swinging nicely. Finally, for views of the overall setups for both of our two pendulums, click here. Back to the website main page.